DIY Cozy Hideouts for Your Golden Hamster: Craft Ideas You Can’t Miss
Welcome to the wonderful world of DIY pet enrichment! If you’re a proud owner of a golden hamster, you know that providing a comfortable, stimulating environment is key to their happiness and health. In this article, we’ll explore various DIY hideout ideas that you can craft using materials like cardboard, fabric, and small wooden boxes. We’ll also discuss safety considerations, comfort factors, and customization tips to ensure your golden hamster enjoys a cozy retreat.
Understanding Your Golden Hamster’s Needs
Golden hamsters are nocturnal creatures that love to burrow and explore. They require a safe, quiet place to rest during the day and to hide from perceived threats. A well-designed hideout will provide them with a sense of security and comfort, which is crucial for their overall well-being.
Safety Considerations
When crafting hideouts for your hamster, safety should always be your top priority. Avoid using materials that could harm your pet, such as sharp edges, toxic glues, or chemicals. Opt for natural fibers, untreated wood, and non-toxic paints. Ensure all openings are large enough for your hamster to enter but not so big that they can get stuck or injured.
Comfort Factors
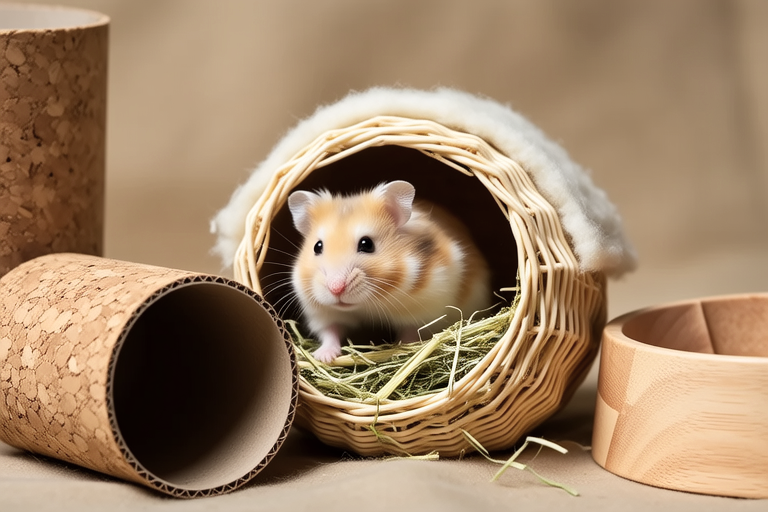
A good hideout should be soft, warm, and spacious enough for your hamster to stretch out comfortably. It should also be easy to clean and maintain. Consider adding soft bedding material inside the hideout to make it more inviting for your pet.
Step-by-Step Instructions for Cardboard Hideouts
Cardboard Tunnel
This simple yet effective tunnel can be made from a single piece of corrugated cardboard. Follow these steps:
- Measure and cut a piece of cardboard to approximately 8 inches wide and 12 inches long.
- Cut a slit along one side of the cardboard, leaving about an inch at the end uncut.
- Roll the cardboard into a tube, aligning the uncut edge with the slit, and secure it with tape.
- Add some bedding material inside the tunnel to make it more comfortable.
Cardboard Igloo
This cozy igloo is perfect for hamsters who love to burrow. Here’s how to make it:
- Take a medium-sized cardboard box and cut out a circular opening on one side, slightly larger than your hamster.
- Use scissors to carefully cut the bottom of the box to create a rounded base.
- Trim any rough edges and reinforce the opening with tape.
- Line the inside of the igloo with soft bedding for extra comfort.
Step-by-Step Instructions for Fabric Hideouts
Fabric Tunnel
This tunnel provides a snug, cozy space for your hamster to explore. Here’s how to create it:
- Choose a piece of fabric, such as fleece or flannel, that is soft and non-abrasive.
- Cut the fabric into a rectangle measuring about 12 inches by 18 inches.
- Roll the fabric into a tube, tucking the ends under each other to secure it.
- Use fabric glue or sew the seam closed to prevent unraveling.
- Place the tunnel in your hamster’s cage, ensuring it’s stable and won’t tip over.
Fabric Burrow
This burrow offers multiple chambers for your hamster to explore and rest in. Follow these steps:
- Choose several pieces of fabric, each measuring about 12 inches by 12 inches.
- Stack the fabrics and cut out circles of varying sizes, starting from the center of each piece.
- Overlap the edges of the circles and secure them with fabric glue or sewing.
- Create additional chambers by connecting smaller circles to the main burrow.
- Line the chambers with soft bedding to enhance comfort.
Step-by-Step Instructions for Wooden Box Hideouts
Simple Wooden Box
This straightforward hideout is easy to make and provides a sturdy, secure space for your hamster. Here’s how to build it:
- Select a small wooden box with a lid, ensuring it has no sharp edges or splinters.
- Drill a hole in one side of the box, large enough for your hamster to enter easily.
- Smooth any rough edges with sandpaper and apply a thin layer of non-toxic paint or varnish if desired.
- Place bedding material inside the box to make it more comfortable.
Multi-Level Wooden Box
This multi-level hideout offers more space and complexity for your hamster to explore. Here’s how to construct it:
- Gather two or three wooden boxes of different sizes.
- Drill holes in the sides of the boxes to allow your hamster to move between levels.
- Connect the boxes securely using strong glue or nails.
- Smooth any rough edges and add non-toxic paint or varnish if desired.
- Fill each level with bedding material and arrange them in your hamster’s cage.
Customizing Hideouts Based on Individual Preferences
Every hamster has unique preferences, so it’s important to observe your pet’s behavior and adjust their hideout accordingly. Some hamsters prefer dark, enclosed spaces, while others enjoy open, airy areas. Consider the following tips:
- Provide multiple hideouts of different sizes and shapes to give your hamster choices.
- Rotate hideouts periodically to keep your hamster interested and engaged.
- Observe your hamster’s interaction with the hideouts and make adjustments as needed.
Adapting Hideouts to Living Space
The size and layout of your living space may influence the type of hideout you choose for your hamster. Here are some considerations:
- If you have limited space, opt for compact hideouts that don’t take up much room.
- In larger cages, consider multi-level hideouts that offer more exploration opportunities.
- Ensure the hideout fits comfortably within the cage and doesn’t obstruct other areas.
Conclusion
Creating DIY hideouts for your golden hamster is a fun and rewarding way to enhance their living environment. By following these step-by-step instructions and considering safety, comfort, and customization, you can provide your pet with a cozy, enriching retreat. Remember to observe your hamster’s preferences and adapt the hideouts accordingly to ensure they are happy and healthy. Happy crafting!